Django forms:
Q.Why do we need Django forms?
- Quickly generate HTML form widgets
- Validate data and process it into a Python data structure
- Create form versions of our Models, quickly update models from Forms
The first thing we need to do is create a forms.py file inside the application!
Then inside forms.py give fields we want inside our form
from django import forms
class FormName(forms.Form):
    name = forms.CharField()
    email = forms.EmailField()
    text = forms.CharField(widget=forms.Textarea)
Now we need to link our forms.py to views.py so we can create a view with them,
from . import forms
def form_name_view(request):
    form = forms.FormName()
    return render(request,’form_name.html’,
                            {‘form’:form})
Then we need to add the view to the app’s urls,
from basicapp import views
urlpatterns = [
url(r’formpage/’,views.form_name_view,
    name = ‘form_name’),
]
There are several ways you can “inject” the form using template tagging. You can just pass in the key from the context dictionary, some basic terminologies:
- HTTP stands for Hypertext Transfer Protocol and is designed to enable communication between a client and a server. The client submits a request, the server then responds.
- GET – requests data from a resource
- POST – submits data to be process to a resource.
<!DOCTYPE html>
<html>
<head>
<meta charset="utf-8">
<title>Forms</title>
<link rel="stylesheet" href="https://stackpath.bootstrapcdn.com/bootstrap/4.1.3/css/bootstrap.min.css"
integrity="sha384-MCw98/SFnGE8fJT3GXwEOngsV7Zt27NXFoaoApmYm81iuXoPkFOJwJ8ERdknLPMO" crossorigin="anonymous">
<!-- Calling bootstrap API -->
</head>
<body>
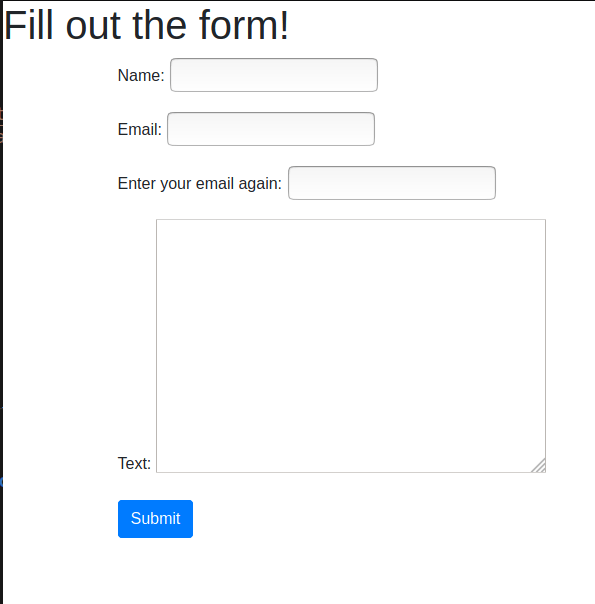
<h1>Fill out the form!</h1>
<div class="container">
<form method="POST">
{{ form.as_p }}
<!-- If you dont use .as_p it will display the form in a bit of ugly format -->
{% csrf_token %}
<!--Cross-Site Request Forgery (CSRF) token, which secures the HTTP POST action that is initiated on the subsequent submission of a form.
-->
<input type="submit" class="btn btn-primary" value="Submit">
</form>
</div>
</body>
</html>
The Django framework requires the CSRF token to be present. As, Cross-Site Request Forgery (CSRF) token, which secures the HTTP POST action that is initiated on the subsequent submission of a form.
A basic forms Application :
1.We will make a new app
2.Create a forms.py inside the app, and start to fill it
class FormName(forms.Form):
    name = forms.CharField()
    email = forms.EmailField()
    verify_email = forms.EmailField(label='Enter your email again:')
    text = forms.CharField(widget=forms.Textarea)
3. Now we will start working to create a view for it,
from django.shortcuts import render
from . import forms
# Create your views here.

def index(request):
    return render(request,'basicapp/index.html')

def form_name_view(request):
    form = forms.FormName()

    if request.method == 'POST':
        # If some one posted something back
        form = forms.FormName(request.POST)

        if form.is_valid():
            # If form is valid
            # DO SOMETHING CODE
            print("VALIDATION SUCCESS!")
            print("NAME: "+form.cleaned_data['name'])
            print("EMAIL: "+form.cleaned_data['email'])
            print("TEXT: "+form.cleaned_data['text'])

    return render(request,'basicapp/form_page.html',{'form':form})
4..We will integrate it with urls.py of the app,
from django.urls import path
from . import views

urlpatterns = [
    path('',views.index,name='index'),
path('formpage/',views.form_name_view,name='form_name'),
]
5.Now we will go and work on HTML templates and tags
<!DOCTYPE html>
<html>
  <head>
    <meta charset="utf-8">
    <title>Forms</title>
    <link rel="stylesheet" href="https://stackpath.bootstrapcdn.com/bootstrap/4.1.3/css/bootstrap.min.css"
    integrity="sha384-MCw98/SFnGE8fJT3GXwEOngsV7Zt27NXFoaoApmYm81iuXoPkFOJwJ8ERdknLPMO" crossorigin="anonymous">
    <!-- Calling bootstrap API -->
  </head>
  <body>

    <h1>Fill out the form!</h1>
    <div class="container">
      <form method="POST">
          {{ form.as_p }}
          <!-- If you dont use .as_p it will display the form in a bit of ugly format -->
          {% csrf_token %}
          <!-- It's for security of data  -->
        <input type="submit" class="btn btn-primary" value="Submit">
      </form>
    </div>

  </body>
</html>
Django has built-in validators you can conveniently use to validate your forms or to check for bots trying to disrupt your web project
Q.what if we wanted to save it to a model?
Django makes accepting form input and passing it to a model very simple!
Instead of inheriting from the forms.Forms class, we will use forms.ModelForm in our forms.py file. This helper class allows us to create a form from a pre-existing model
We then add an inline class (something we haven’t seen before) called Meta This Meta class provides information connecting the model to the form.
from django import forms
from myapp.models import MyModel
class MyNewForm(forms.ModelForm):
    # Form Fields go here
        class Meta:
            model = MyModel
        fields = # Let’s see the options!
You can choose the fields you want to modify,
- fields = “__all__”
- exclude=[‘field1’,..]
- fields=(“field1”,..)
You can make something like a sign up page, with a little twerks in the views.py file
from django.shortcuts import render
from .forms import NewUserForm

def index(request):
    return render(request,'appTwo/index.html')

def users(request):
    form = NewUserForm()

    if request.method == "POST":
        form = NewUserForm(request.POST)
        if form.is_valid():
            form.save(commit=True)
#If you don't want to save data put, commit=False
            return index(request)
        else:
            print('ERROR FORM INVALID')

    return render(request,'appTwo/users.html',{'form':form})
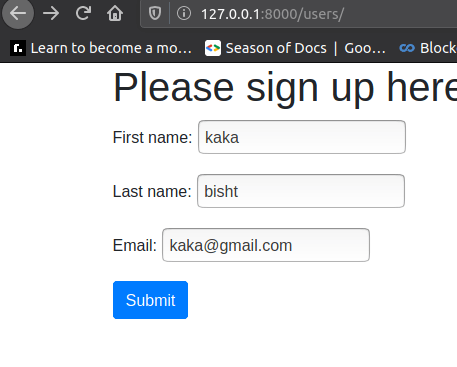
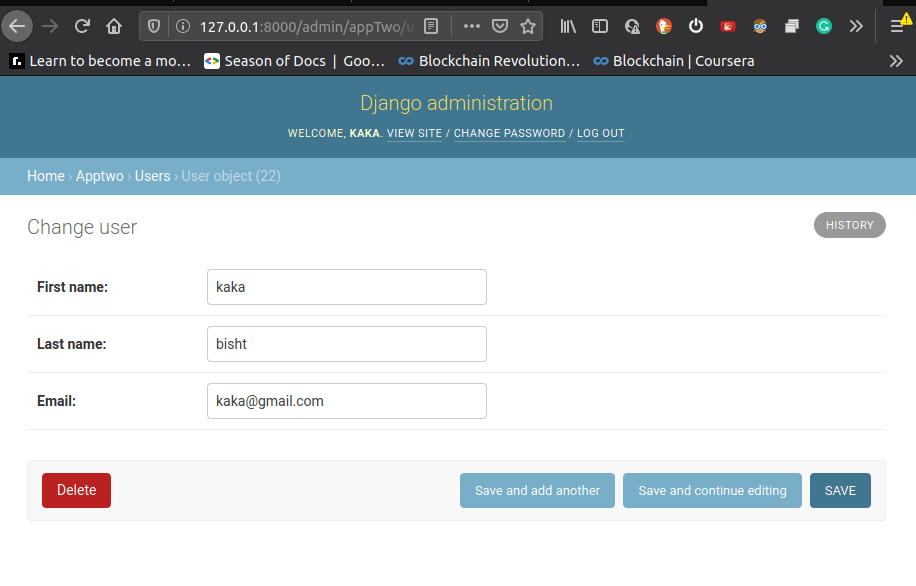
Then check if it is visible in admin interface
Templates :
We can actually use templates to have a “base” template and inherit that template in the html files. This saves you a lot of time and will help create a unified look and feel across every page of your website!
Templates are also used to solve issues with relative paths and working with variables. Templates can also help solve issues by avoiding hard-coded URL paths. Templates also come with built-in filter capabilities so you can adjust variables on the actual individual page.
Relative URLS,
How can we replace a hard coded URL path in an href with a URL Template?
The best way to use URL templates:
<a href=”basicapp/thankyou”>Thanks</a>
Can be changed to:
<a href=”{% url‘basicapp:thankyou’%}”>
   Thanks</a>
This method requires that app_name variable to be created inside the urls.py file!
Now an simple example would be to just fix some HTML files with views and link it with urls.py
1.make html files

2.make views for them in views.py
from django.shortcuts import render

# Create your views here.
def index(request):
    context={'text':"hello world", 'number':100}
    return render(request,'basic_app/index.html', context)

def other(request):
    return render(request,'basic_app/other.html')

def relative(request):
    return render(request,'basic_app/relative_url_templates.html')
3.Connect it to urls
from django.urls import path
from . import views

# SET THE NAMESPACE!, for TEMPLATE TAGGING
app_name = 'basic_app'

urlpatterns=[
    path('relative/',views.relative,name='relative'),
    path('other/',views.other,name='other'),
]
4.connect all the HTML files with base.HTML file for a flow
base HTML file
<!DOCTYPE html>
<html>
  <head>
    <meta charset="utf-8">
    <title>Base</title>
    <!-- Latest compiled and minified CSS -->
    <link rel="stylesheet" href="https://stackpath.bootstrapcdn.com/bootstrap/4.1.3/css/bootstrap.min.css"
    integrity="sha384-MCw98/SFnGE8fJT3GXwEOngsV7Zt27NXFoaoApmYm81iuXoPkFOJwJ8ERdknLPMO" crossorigin="anonymous">

  </head>
  <body>
    <nav class="navbar navbar-expand-lg navbar-light bg-light">
      <div class="navbar-nav">
        <a class="navbar-brand" href="{% url 'index' %}">DJANGO</a>
        <a class="nav-item nav-link" href="{% url 'admin:index' %}">Admin</a>
        <a class="nav-item nav-link" href="{% url 'basic_app:other' %}">Other</a>
      </div>
    </nav>

    <div class="container">
    {% block body_block %}
    {# Anything outside of this will be inherited if you use extend.#}
    {% endblock %}
    </div>

  </body>
</html>
index HTML file,
{% extends "basic_app/base.html" %}

    {% block body_block%}

    <h1>Hello and welcome to the site!</h1>
      <!-- <h1>This is the index.html page</h1> -->
    <h1>{{ text }}</h1>

{% endblock %}
views.py file
from django.shortcuts import render

# Create your views here.
def index(request):
    context={'text':"hello world"}
    return render(request,'basic_app/index.html', context)

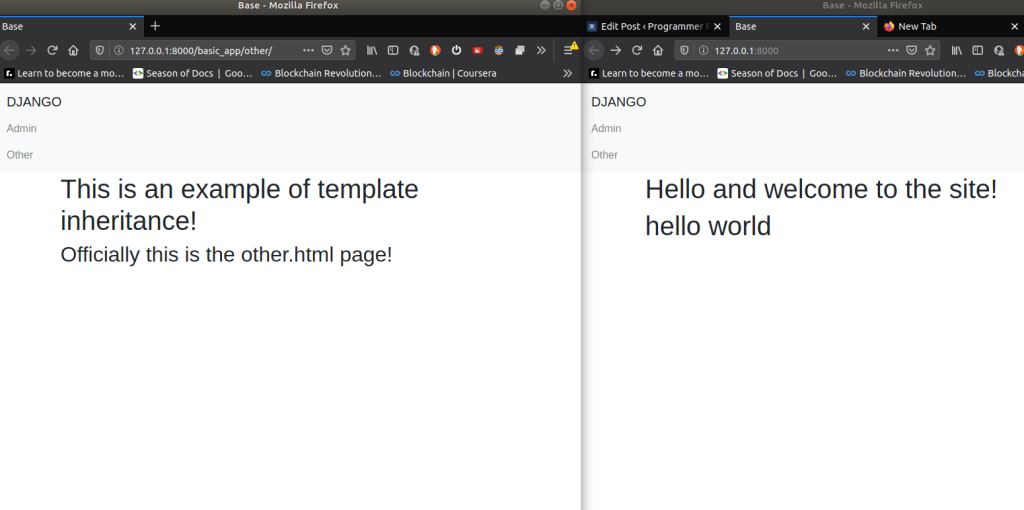
Inheriting HTML file :
Template inheritance allows us to create a base template we can inherit fromThis saves us a lot of repetitive work and makes it much easier to maintain the same base look and feel across our entire website!
Here are the main steps for inheritance:
- Find the repetitive parts of your project
- Create a base template of them
- Set the tags in the base template
- Extend and call those tags anywhere
Base html
<!DOCTYPE html>
<html>
  <head>
    <meta charset="utf-8">
    <title>Base</title>
    <!-- Latest compiled and minified CSS -->
    <link rel="stylesheet" href="https://stackpath.bootstrapcdn.com/bootstrap/4.1.3/css/bootstrap.min.css"
    integrity="sha384-MCw98/SFnGE8fJT3GXwEOngsV7Zt27NXFoaoApmYm81iuXoPkFOJwJ8ERdknLPMO" crossorigin="anonymous">

  </head>
  <body>
    <nav class="navbar navbar-expand-lg navbar-light bg-light">
      <div class="navbar-nav">
        <a class="navbar-brand" href="{% url 'index' %}">DJANGO</a>
        <a class="nav-item nav-link" href="{% url 'admin:index' %}">Admin</a>
        <a class="nav-item nav-link" href="{% url 'basic_app:other' %}">Other</a>
      </div>
    </nav>

    <div class="container">
    {% block body_block %}
    {# Anything outside of this will be inherited if you use extend.#}
    {% endblock %}
    </div>

  </body>
</html>
inherited HTML file,
<!DOCTYPE html>
{% extends "basic_app/base.html" %}
    {% block body_block %}
    <h1>This is an example of template inheritance!</h1>
    <h2>Officially this is the other.html page!</h2>
    {% endblock %}
views.py file
from django.shortcuts import render

# Create your views here.
def index(request):
    context={'text':"hello world"}
    return render(request,'basic_app/index.html', context)

def other(request):
    return render(request,'basic_app/other.html')
Template Filter:
Imagine that you had some information from your model that you wished to use across various views/pages. But perhaps you wanted to make a slight edit to the information before injecting it, like string operations, or arithmetic.
Luckily Django provides a ton of easy to implement template filters that allow you to effect the injection before displaying it to the user.
This allows for flexibility from a single source!
The general form for a template filter is:
{{ value | filter:”parameter” }}
Filter HTML file
{% extends "basic_app/base.html" %}
{% load my_extras %}

    {% block body_block%}

    <h1>Hello and welcome to the site!</h1>
      <!-- <h1>This is the index.html page</h1> -->
    <h1>{{ text|cutout:"hello" }}</h1>
    <h1>{{ number|add:99 }}</h1>
    {% endblock %}

User Authentication :
This is one of the aspects of Django where there are lots of built in available tools as well as plenty of external packages that enhance functionality.
We will focus mainly on the built-in tools:
- Users and the User Model
- Permissions
- Groups
- Passwords and Authentication
- Logging In and Out
1.Passwords :
The first thing we need to take care of is setting up our ability to authenticate a User.
- To do this we need to use some built-in apps and make sure they are under the INSTALLED_APPS list in settings.py
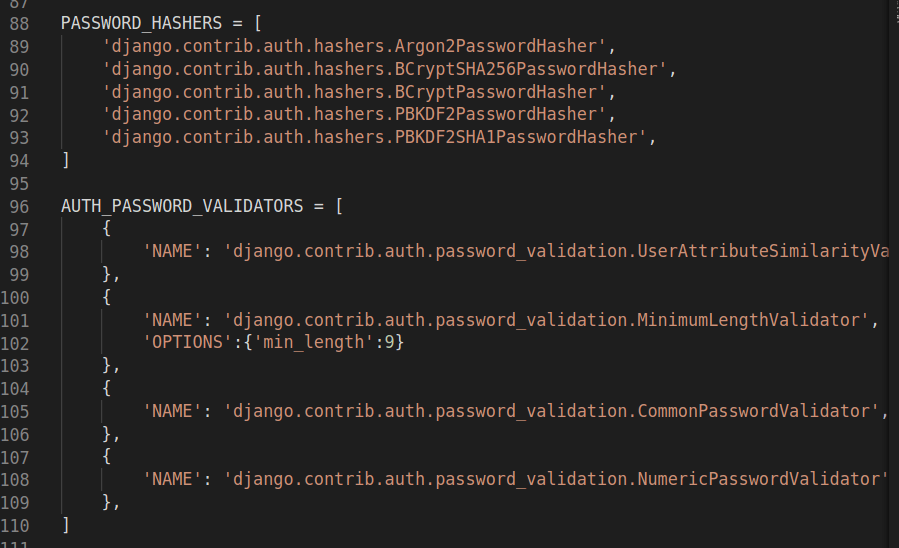
The next thing we need to do is make sure we store our passwords safely.
- Never store passwords as plain text!
- We use the default PBKDF2 algorithm with a SHA256 hash that is built-in to Django.
But if you want more security you can upgrade to even more secure hashing algorithms like bcrypt or argon2
We can also add in validator options to prevent a user from doing that.
After all these changes please migrate, make migrations and migrate again.
2.User Authorization Models:
Django’s built in tools to create User Authorization Models.
The User object has a few key features:
- Username
- Password
- First Name
- Surname
We don’t directly inherit from user we create a one to one relationship, you can extend the basic user model.
Typically images, CSS, JS, etc. all go in the static folder of your app, User-uploaded content will go to the media folder.
A lot of the coding for working with Users and Authorization happens in the views.py file. The basic idea is that we check if there is a POST request and then perform some sort of action based off that information. Sometimes we will want to save that information directly to the database. Other times, we will set commit=False so we can manipulate the data before saving it to the database.
model.py file example.
from django.db import models
from django.contrib.auth.models import User

# Create your models here.
class UserProfileInfo(models.Model):

    # Create relationship (don't inherit from User!)
    user = models.OneToOneField(User, on_delete=models.CASCADE)

    # Add any additional attributes you want
    portfolio_site = models.URLField(blank=True)
    # pip install pillow to use this!

    profile_pic = models.ImageField(upload_to='basic_app/profile_pics',blank=True)

    def __str__(self):
        # Built-in attribute of django.contrib.auth.models.User !
        return self.user.username
3.Logins :
Once a user is registered, we want to make sure that they can log in and out of the site.
This process involves:
- Using built-in decorators for access
- Adding the LOGIN_URL in settings
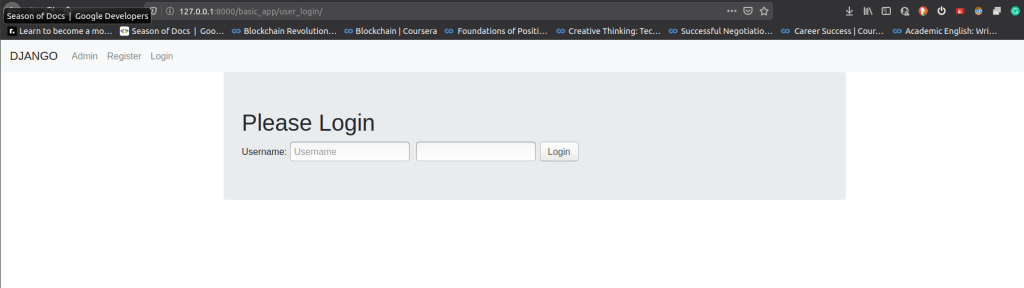
- Creating the login.html
- Editing the urls.py files
There are a lot of inbuilt decorators and functionality ,
- from django.contrib.auth import authenticate, login, logout : used to help user login, authenticate and then logout .
- from django.http import HttpResponseRedirect, HttpResponse : used to display or return Http Response
- from django.urls import reverse : to take reverse path in the HTML file,when ever a action take place in the application
- from django.contrib.auth.decorators import login_required : Asking user to login before viewing an app
An example of views.py file,
from django.shortcuts import render
from .forms import UserForm,UserProfileInfoForm

# Extra Imports for the Login and Logout Capabilities
from django.contrib.auth import authenticate, login, logout
from django.http import HttpResponseRedirect, HttpResponse
from django.urls import reverse
from django.contrib.auth.decorators import login_required

# Create your views here.
def index(request):
    return render(request,'basic_app/index.html')

@login_required
def special(request):
    # Remember to also set login url in settings.py!
    # LOGIN_URL = '/basic_app/user_login/'
    return HttpResponse("You are logged in. Nice!")

@login_required
def user_logout(request):
    # Log out the user.
    logout(request)
    # Return to homepage.
    return HttpResponseRedirect(reverse('index'))

def register(request):

    registered = False

    if request.method == 'POST':

        # Get info from "both" forms
        # It appears as one form to the user on the .html page
        user_form = UserForm(data=request.POST)
        profile_form = UserProfileInfoForm(data=request.POST)

        # Check to see both forms are valid
        if user_form.is_valid() and profile_form.is_valid():

            # Save User Form to Database
            user = user_form.save()

            # Hash the password
            user.set_password(user.password)

            # Update with Hashed password
            user.save()

            # Now we deal with the extra info!

            # Can't commit yet because we still need to manipulate
            profile = profile_form.save(commit=False)

            # Set One to One relationship between
            # UserForm and UserProfileInfoForm
            profile.user = user

            # Check if they provided a profile picture
            if 'profile_pic' in request.FILES:
                print('found it')
                # If yes, then grab it from the POST form reply
                profile.profile_pic = request.FILES['profile_pic']

            # Now save model
            profile.save()

            # Registration Successful!
            registered = True

        else:
            # One of the forms was invalid if this else gets called.
            print(user_form.errors,profile_form.errors)

    else:
        # Was not an HTTP post so we just render the forms as blank.
        user_form = UserForm()
        profile_form = UserProfileInfoForm()

    # This is the render and context dictionary to feed
    # back to the registration.html file page.
    return render(request,'basic_app/registration.html',
                          {'user_form':user_form,
                           'profile_form':profile_form,
                           'registered':registered})

def user_login(request):

    if request.method == 'POST':
        # First get the username and password supplied
        username = request.POST.get('username')
        password = request.POST.get('password')

        # Django's built-in authentication function:
        user = authenticate(username=username, password=password)

        # If we have a user
        if user:
            #Check it the account is active
            if user.is_active:
                # Log the user in.
                login(request,user)
                # Send the user back to some page.
                # In this case their homepage.
                return HttpResponseRedirect(reverse('index'))
            else:
                # If account is not active:
                return HttpResponse("Your account is not active.")
        else:
            print("Someone tried to login and failed.")
            print("They used username: {} and password: {}".format(username,password))
            return HttpResponse("Invalid login details supplied.")

    else:
        #Nothing has been provided for username or password.
        return render(request, 'basic_app/login.html', {})
The general flow should during user authentication should be:
- First user signs up on the website
- User then logins in to the website
- Then we is able to see specific content for the user