So, to understand this blog you require a basic understanding of command line interface, SQL requests and Python.
Django is a free and open source web framework. It is used by many sites, including Pinterest, PBS, Instagram, BitBucket, Washington Times, Mozilla, and more!
The original documentation done for Django by Django and Mozilla community is so useful, that i have mostly always taken help from them.
Q.How do we have a steady version of any packages or software?
A self-contained directory tree, i.e a virtual environment
A virtual environment allows you to have a virtual installation of Python and packages on your computer.
1. Create a virtual environment for your project
- In the terminal client enter the following where yourenvname is the name you want to call your environment, and replace x.x with the Python version you wish to use. (To see a list of available python versions first, type
conda search "^python$"and press enter.)
conda create -n yourenvname python=x.x anaconda
2. Activate your virtual environment.
- To activate or switch into your virtual environment, simply type the following where yourenvname is the name you gave to your environement at creation.
source activate yourenvname
To see a list of all your environments, use the command conda info -e.
3. Install additional Python packages to a virtual environment.
- To install additional packages only to your virtual environment, enter the following command where yourenvname is the name of your environemnt, and [package] is the name of the package you wish to install. Failure to specify “-n yourenvname” will install the package to the root Python installation.
conda install -n yourenvname [package]
4. Deactivate your virtual environment.
- To end a session in the current environment, enter the following. There is no need to specify the envname – which ever is currently active will be deactivated, and the PATH and shell variables will be returned to normal.
source deactivate
5. Delete a no longer needed virtual environment
- To delete a conda environment, enter the following, where yourenvname is the name of the environment you wish to delete.
conda remove -n yourenvname -all
For Information on how to install Django, https://docs.djangoproject.com/en/3.0/topics/install/
Try to always work inside in a virtual environment, to keep your project steady
Q.What do you mean by Django Project and Application?
A Django Project is a collection of applications and configurations that when combined together will make up the full web application (your complete website running with Django)
A Django application is created to perform a particular functionality for your entire web application. For example, you could have a registration app, a polling app, comments app, etc.
How to start a project ?
Now to start a project in Django, you have to type this in command line
django-admin startproject project_name
Now when you have done this, it should look something like this,
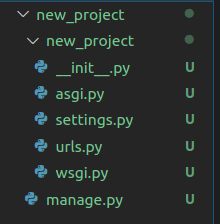
- __init__.py: This is a blank Python script that due to its special name lets Python know that this directory can be treated as a package
- settings.py: This is where you will store all your project settings
- urls.py: This is a Python script that will store all the URL patterns for your project. Basically the different pages of your web application.
- wsgi.py: This is a Python script that acts as the Web Server Gateway Interface. Help us deploy our web app to production
- manage.py: This is a Python script that we will use a lot. It will be associates with many commands as we build our web app!
Q. How to check if everything is running correctly ?
Run the server and check, it can be done with
python manage.py runserver
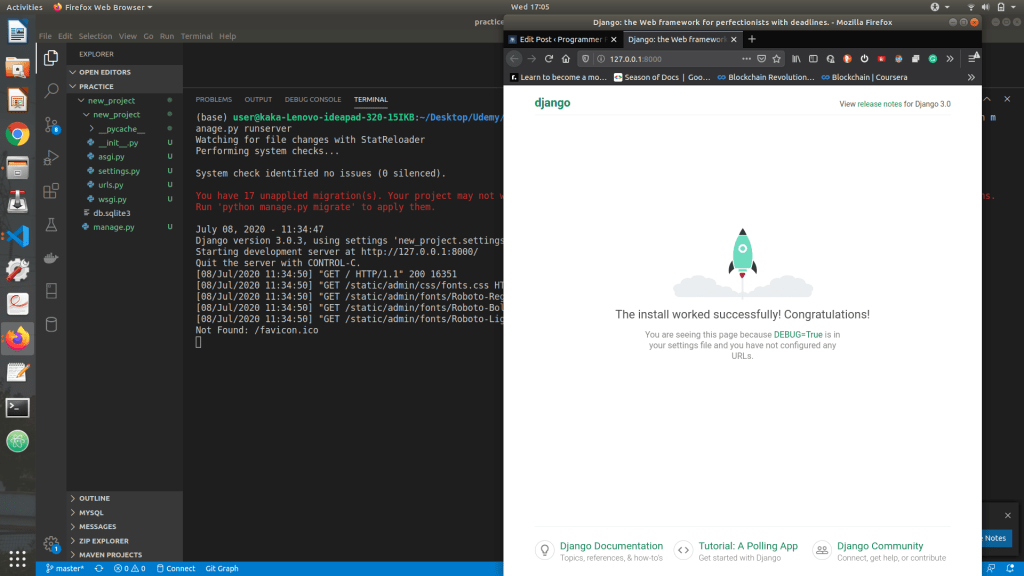
Q. What do the red warnings mean ?
That there is no connection between database and Django, this can be solved by Migration
Migration allows you to move databases from one design to another, this is also reversible. So you can “migrate” your database.
How to start a project ?
You can create a Django app, by writing
python manage.py startapp first_app
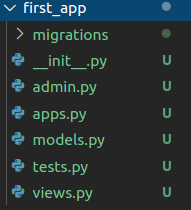
- __init__.py: This is a blank Python script that due to its special name lets Python know that this directory can be treated as a package
- admin.py: You can register your models here which Django will then use them with Django’s admin interface.
- apps.py: Here you can place application-specific configurations
- models.py: Here you store the application’s data models
- tests.py: Here you can store test functions to test your code
- views.py: This is where you have functions that handle requests and return responses
- Migrations folder: This directory stores database specific information as it relates to the models
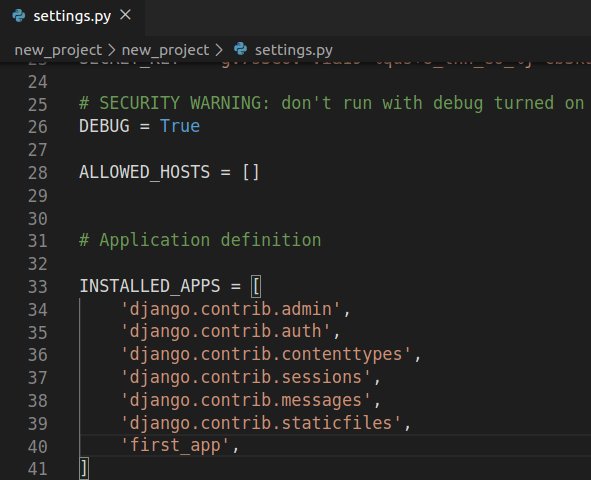
When ever you make an app, always specify it in the Project settings folder,
The flow of data is transferred in Django is

Hello world App
Let’s go step by step to create a basic, “Hello World” Http Response ,
1.You have to define your views.py file in the app directory
from django.shortcuts import render
from django.http import HttpResponse
# Create your views here.

#A view function is index,
#by convention we call the parameter request
def index(request):
    return HttpResponse("Hello World")
You can also insert direct HTML Code there,
def index(request):
    return HttpResponse("<em>Hello World!</em>")
2. Now you have to link it to a url by using urls.py in project directory,
Django gives you a few lines to help you understand how to get started with linking views.py to urls
"""new_project URL Configuration

The `urlpatterns` list routes URLs to views. For more information please see:
    https://docs.djangoproject.com/en/3.0/topics/http/urls/
Examples:
Function views
    1. Add an import:  from my_app import views
    2. Add a URL to urlpatterns:  path('', views.home, name='home')
Class-based views
    1. Add an import:  from other_app.views import Home
    2. Add a URL to urlpatterns:  path('', Home.as_view(), name='home')
Including another URLconf
    1. Import the include() function: from django.urls import include, path
    2. Add a URL to urlpatterns:  path('blog/', include('blog.urls'))
"""
from django.contrib import admin
from django.urls import path
from first_app import views

urlpatterns = [
    path('admin/', admin.site.urls),
    path('',views.index,name='index')
]
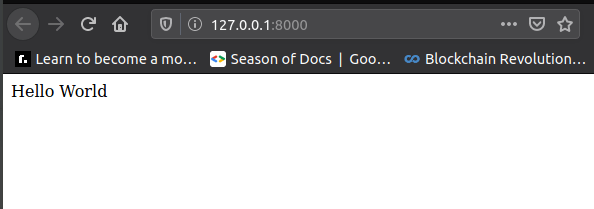
The end result will be a hello world app,
URL mappings :
Previously showed a very direct mapping from the views.py to the urls.py, but what we want is a ability to map project urls to app urls, and then maps it to app views, it just systematic.
The include() function allows us to look for a match with regular expressions and link back to our application’s own urls.py file.
Let’s go step by step,
1.We have to project urls.py a path to app urls.py
from django.contrib import admin
from django.urls import path, include
from first_app import views

urlpatterns = [
    path('', views.index, name="index"),
    path('first_app/', include('first_app.urls')),
#include here gives path to the app urls.py file
    path('admin/', admin.site.urls),
]
2.Now by default we don’t have a urls.py file in the app, but we can create one urls.py file in app
from django.urls import path
from . import views

urlpatterns = [
    path('', views.index, name='index'),
]
Q.How can we integrate this with HTML & CSS ?
Templates are a key part to understanding how Django really works and interacts with your website.
To get started with templates you first need to create a templates directory and then a sub directory for each specific app’s templates.
first_project/first_app/templates/first_app
If instead of following this convention, you want to create a global templates folder and then create app folders inside it and then store inside it.
first_project/templates/first_app
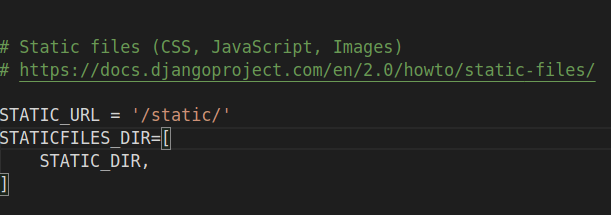
In this case, we want our Django Project to be easily transferable from one computer to another, but the DIR key will require a “hard-coded” path
We can use Python’s os module to dynamically generate the correct file path strings, regardless of the computer! We will use this os module to feed the path to the DIR key inside of the TEMPLATES dictionary. Now if you have templates folder inside the app folder, then you won’t have to deal with this. But what if you have a general templates, which are present in
Well to solve this issue, you have to go to project settings.py and modify the Template part of it

Once we’ve done that we can create an Html file called index.html. Inside this HTML file, we will insert template tags (a.k.a Django Template Variable). This will make Django able to inject content into the HTML.
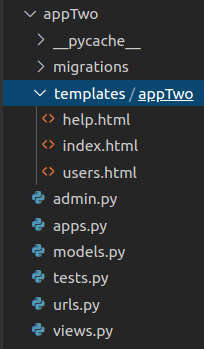
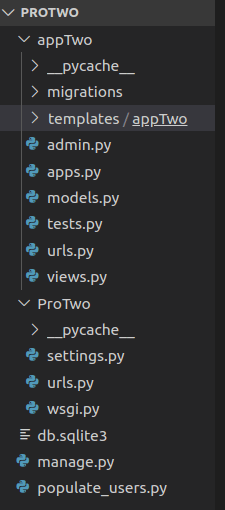
Your file directory should look something to this ,

- static folder: contains your static content such as CSS, JS or your pictures.
- templates/app_name folder: contains the HTML files for a particular app
A basic display app using this information
Let’s assume this is was the HTML text
<!DOCTYPE html>
{% load staticfiles %}
{% comment %} load static file {% endcomment %}
<html>
  <head>
    <meta charset="utf-8">
    <title>This is me</title>
    <link rel="stylesheet" href="{% static "first_app/css/mystyle.css" %}"/>
  </head>
  <body>
    <h1>Hi, this is a picture of myself!</h1>
    <h2>This is the injection from views.py file   {{ insert_me }}</h2>
    <img src="{% static "first_app/images/me.jpg" %}" alt="Uh Oh, didn't show!">
  </body>
</html>
Now we have to modify our views.py file, to point it towards our HTML file,
from django.shortcuts import render
from django.http import HttpResponse
# Create your views here.
def index(request):
    my_dict = {'insert_me':"Hello I am from views.py!"}
    return render(request,'first_app/index.html',context=my_dict)

Now if you notice, we can also insert static files, such as CSS files or JS files, even pictures. It has the same procedure as templates, now I recommend it to a static folder inside a particular app, otherwise, we will have to link it to static files in project settings.py,
An essential part of any website is the ability to accept information from a user and input it into a database and retrieve information from a database and use it to generate content for the user.
Django Model Template View (MTV) :
Models define the structure of stored data, including the field types and possibly also their maximum size, default values, selection list options, help text for documentation, label text for forms, etc. The definition of the model is independent of the underlying database — you can choose one of several as part of your project settings. Once you’ve chosen what database you want to use, you don’t need to talk to it directly at all — you just write your model structure and other code, and Django handles all the dirty work of communicating with the database for you.
Django can have a variety of database options, the default option being SQLite
- A primary key is a unique identifier for each row in a table
- A foreign key just denotes that the column coincides with a primary key of another table

An example of models.py file can be,
from django.db import models

class MyModelName(models.Model):
    """A typical class defining a model, derived from the Model class."""

    # Fields
    my_field_name = models.CharField(max_length=20, help_text='Enter field documentation')
    ...

    # Metadata
    class Meta:
        ordering = ['-my_field_name']

    # Methods
    def get_absolute_url(self):
        """Returns the url to access a particular instance of MyModelName."""
        return reverse('model-detail-view', args=[str(self.id)])

    def __str__(self):
        """String for representing the MyModelName object (in Admin site etc.)."""
        return self.my_field_name
After we’ve set up the models we can migrate the database, Dango can do this entire process with a simple command:
python manage.py migrate
Then register the changes to your app, shown here with some generic “app1”:
python manage.py makemigrations app1
Then migrate the database one more time:
python manage.py migrate
For these models to be displayed in our Admin interface we need to register them to our application’s admin.py file
from django.contrib import admin
from .models import Model1,Model2,Model3
# Register your models here.
admin.site.register(Model1)
admin.site.register(Model2)
admin.site.register(Model3)
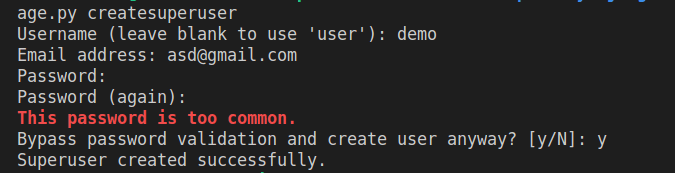
In order to interact with the admin interface, we need to create a superuser, which can be done using
python manage.py createsuperuser
A simple model based app:
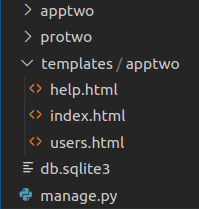
1.We will have to follow all the previous steps, until we have a similar directory tree to
2.Now we will work on models.py file in the app,
models have predefined filed types, which basically help us a lot, we can even further we can use specifications on predefined types such as max_length, unique, etc
class User(models.Model):
    first_name = models.CharField(max_length=128)
    last_name = models.CharField(max_length=128)
    email = models.EmailField(max_length=254,unique=True)
3.After this we will have to migrate our changes to data base ,
python manage.py migrate
python manage.py makemigrations
python manage.py migrate
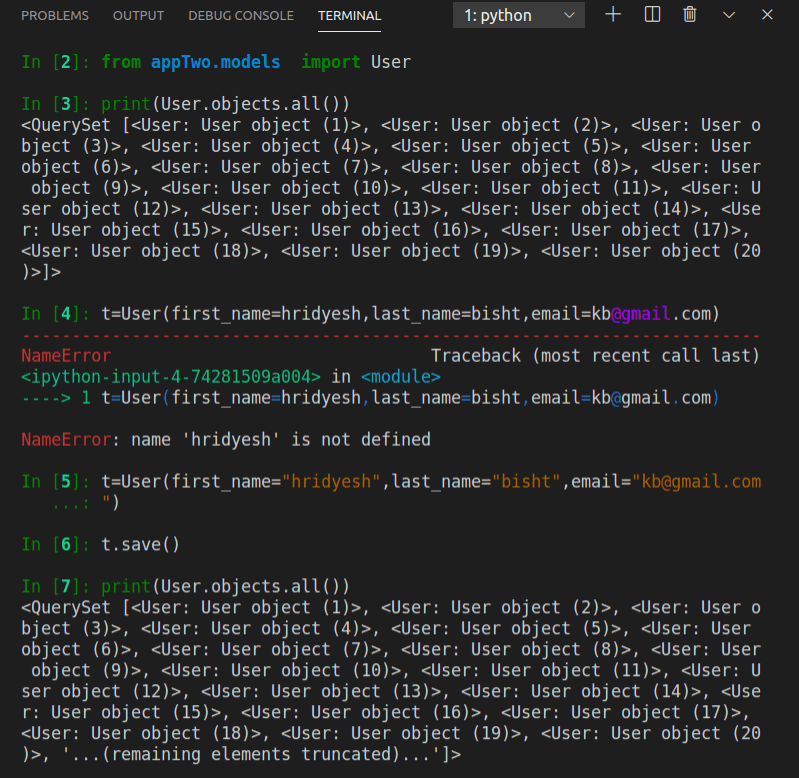
4.We can Also interact with data base via command line
5.register my model in admin .py file
from django.contrib import admin
from .models import User
# Register your models here.
admin.site.register(User)
6.Now create a super user,
python manage.py createsuperuser
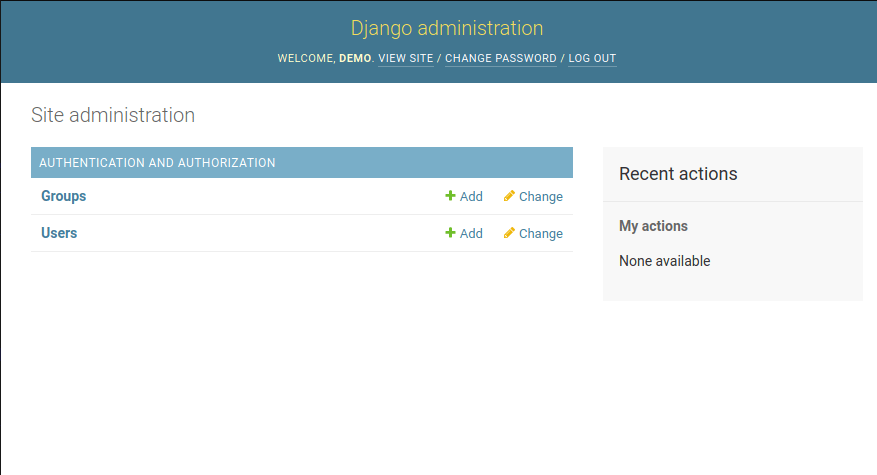
7.Run the server , and got to sever/admin
python manage.py runserver


8.Now if you want to populate your model with fake data to test your app,
We often sometimes need to populate or fill in the database to see how our app will act with some data, it can be done by Faker library, we can make a python script to do this,
For more info, https://faker.readthedocs.io/en/master/
import os
# Configure settings for project
# Need to run this before calling models from application!
os.environ.setdefault('DJANGO_SETTINGS_MODULE','ProTwo.settings')

import django
# Import settings
django.setup()

import random
from appTwo.models import User
from faker import Faker

fakegen = Faker()

def populate(N=5):
    '''
    Create N Entries of Dates Accessed
    '''

    for entry in range(N):

        # Create Fake Data for entry
        fake_name = fakegen.name().split()
        fake_first_name = fake_name[0]
        fake_last_name = fake_name[1]
        fake_email = fakegen.email()

        # Create new User Entry
        user = User.objects.get_or_create(first_name=fake_first_name,
                                          last_name=fake_last_name,
                                          email=fake_email)[0]


if __name__ == '__main__':
    print("Populating the databases...")
    populate(20)
    print('Populating Complete')
The function get_or_create basically get the fields from models,py and if fields are not present in models, it just creates them
Templates integration with database :
There are a few basics steps to achieving the goal of serving dynamic content to a user based off the connection of the models, views , and templates.
- In the views.py file we import any models that we will need to use.
- Use the view to query the model for data that we will need
- Pass results from the model to the template
- Edit the template so that it is ready to accept and display the data from the model.
- Map a URL to the view.
Template tagging :
Now i am going to define a function in app views.py
def users(request):
    user_list = User.objects.order_by('first_name')
    user_dict = {"users":user_list}
    return render(request,'appTwo/users.html',context=user_dict)
users.html page looks like,
<!DOCTYPE html>
<html>
<head>
<meta charset="utf-8">
<title>Users</title>
</head>
<body>
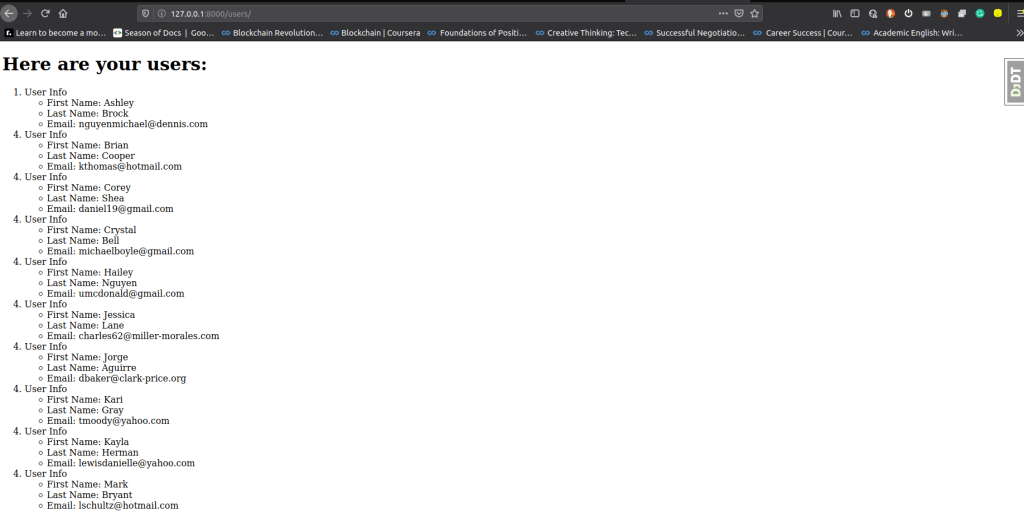
<h1>Here are your users:</h1>
{% if users %}
<!-- To check if there are users -->
<ol>
{% for person in users %}
<!-- Iterate through Users -->
<li>User Info</li>
<ul>
<li>First Name: {{person.first_name}}</li>
<li>Last Name: {{person.last_name}}</li>
<li>Email: {{person.email}}</li>
<!-- Access there fields -->
</ul>
{% endfor %}
</ol>
{% endif %}
</body>
</html>
If all this woks properly then , it should be something like this